2×4 Woodworking Projects: Easy DIY Ideas & Designs for Beginners

Key Takeaways
- 2×4 wood is a versatile material ideal for beginners and experienced woodworkers alike.
- With a few simple tools, you can create functional and stylish furniture and decor.
- Understanding woodworking plans is crucial for the success of any project.
- Basic power tools like a circular saw and a drill are essential for working with 2×4 wood.
- Starting with easy projects like tables and benches can build your skills and confidence.
Unlock Your DIY Potential with 2×4 Woodworking
There’s something deeply satisfying about creating something with your own hands, especially when it comes to woodworking. The scent of sawdust, the buzz of a saw, and the transformation of simple materials into functional art; it’s an experience that can be both meditative and exhilarating. And when it comes to beginner-friendly woodworking, 2×4 wood is the go-to material. It’s readily available, affordable, and versatile, making it perfect for a wide range of projects.
Why 2×4 Wood is Perfect for Beginners
Starting out in 2×4 woodworking can be intimidating, with the variety of woods, tools, and techniques available. That’s where 2×4 wood comes in. It’s a standard size that’s easy to handle, and it’s strong enough for building sturdy furniture. Plus, its uniformity means you can focus on honing your skills without worrying about the complexities of working with different wood sizes and types.
Versatility of 2×4 Wood in DIY Projects
- Indoor furniture: From bookshelves to coffee tables, 2x4s can be used to create a variety of furniture pieces.
- Outdoor projects: Build picnic tables, garden benches, or even a swing set using 2×4 wood.
- Decorative items: Create picture frames, wall art, or even candle holders for a personalized touch.
Whether you’re looking to furnish your home, build a gift for a friend, or just enjoy the process of making something from scratch, 2×4 wood is a fantastic starting point.
Planning Your Project
Before diving into your first project, it’s important to have a plan. This doesn’t just mean a design or an idea in your head; you’ll need detailed plans that include measurements, material lists, and step-by-step instructions. These plans will guide you through the process and help ensure that your project turns out just as you’ve envisioned it.
Finding the Right Plans for Your Skill Level
As a beginner, you’ll want to start with plans that are designed for your skill level. Look for plans that require basic cuts and assembly techniques. As you gain confidence and experience, you can progress to more complex projects. There are plenty of resources online where you can find free or paid plans tailored to different skill levels.
“Starting with simple plans that have clear instructions will not only make the process more enjoyable but also increase the chances of a successful project.”
Finding the right plans for your skill level is crucial. It’s the difference between a project that’s a joy to build and one that ends up as a frustrating puzzle with pieces that don’t quite fit.
Reading and Understanding Woodworking Plans
Once you’ve found a plan, take the time to read through it thoroughly before you start cutting any wood. Look for a list of materials, tools needed, and any specific instructions or tips that might be included. Understanding the plans is key to a smooth building process.
Tools of the Trade
Having the right tools is essential for any woodworking project. Thankfully, when starting out in 2×4 woodworking, you don’t need an extensive collection of tools. A few basics will get you started on most projects.
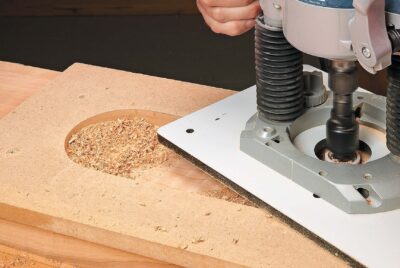
Essential Tools to Get Started
- Circular saw or miter saw: For making straight cuts across your 2x4s.
- Drill: For drilling holes and driving screws.
- Measuring tape and pencil: Precision is key, so measure twice, cut once.
- Square: To ensure your cuts are perfectly perpendicular.
- Sanding tools: For smoothing out rough edges and surfaces.
With these tools in hand, you’ll be well-equipped to tackle a variety of projects. And remember, while power tools can make the job faster and easier, you can also accomplish a lot with hand tools if you’re just starting out.
Stay tuned as we delve deeper into specific project ideas and step-by-step guides to help you bring your 2×4 woodworking projects to life.
2×4 Woodworking DIY Project Ideas
Now, let’s get into the fun part—choosing a project. The beauty of 2×4 wood is that it can be transformed into just about anything you can imagine. Whether you’re outfitting your home with new furniture or creating something for your outdoor space, the possibilities are endless. Below, you’ll find a range of project ideas that are not only easy to tackle but also incredibly rewarding once completed.
- Classic Adirondack chair for your patio
- Sturdy shelves for your garage or workshop
- Chic coffee table for your living room
- Rustic dining table that becomes the heart of your home
- Functional garden planter boxes to green your space
These are just a handful of ideas to get your creative juices flowing. Remember, the key to a successful project is starting with something that excites you and fits your needs. Most importantly, choose a project that matches your current skill level and allows you to learn as you go.
Indoor Furniture Projects
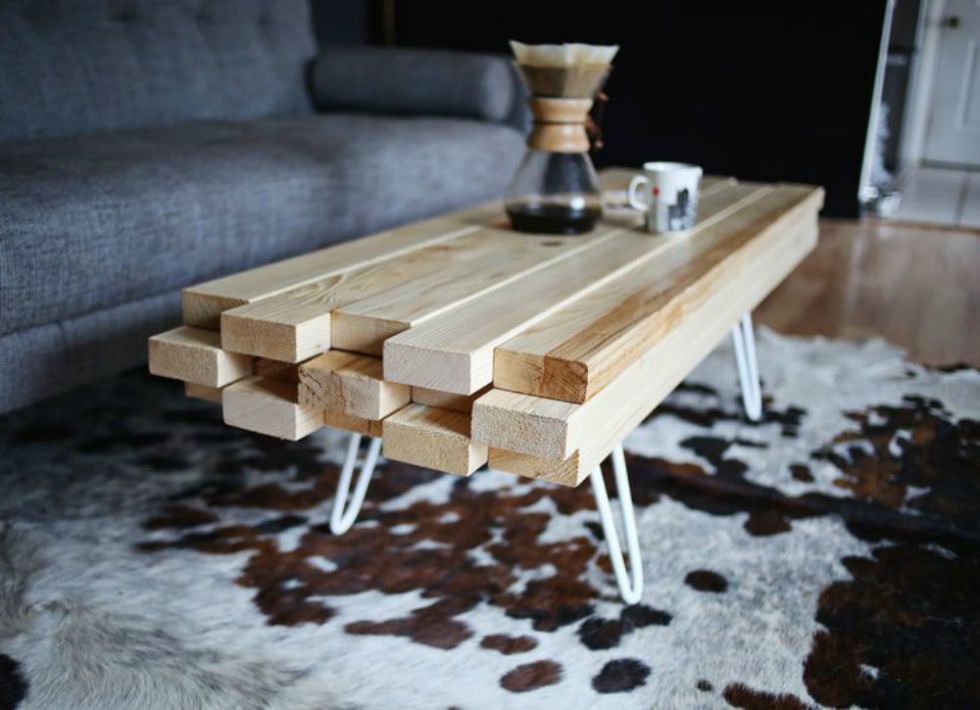
Indoor furniture is a great place to start because it often stays protected from the elements, allowing you more time to perfect your craft without worrying about weather damage. A simple side table or bookshelf can provide both function and a sense of accomplishment.
For example, a 2×4 coffee table not only serves as a central piece in your living area but also teaches you the basics of framing and joining techniques. Plus, you can customize the design to fit your personal style, whether that’s modern, rustic, or somewhere in between.
“A 2×4 side table is the perfect beginner project. It’s small enough to be manageable but also provides valuable lessons in construction and design.”
The simplicity of these projects doesn’t mean they lack elegance. With the right finish and attention to detail, your 2×4 furniture can look surprisingly sophisticated.
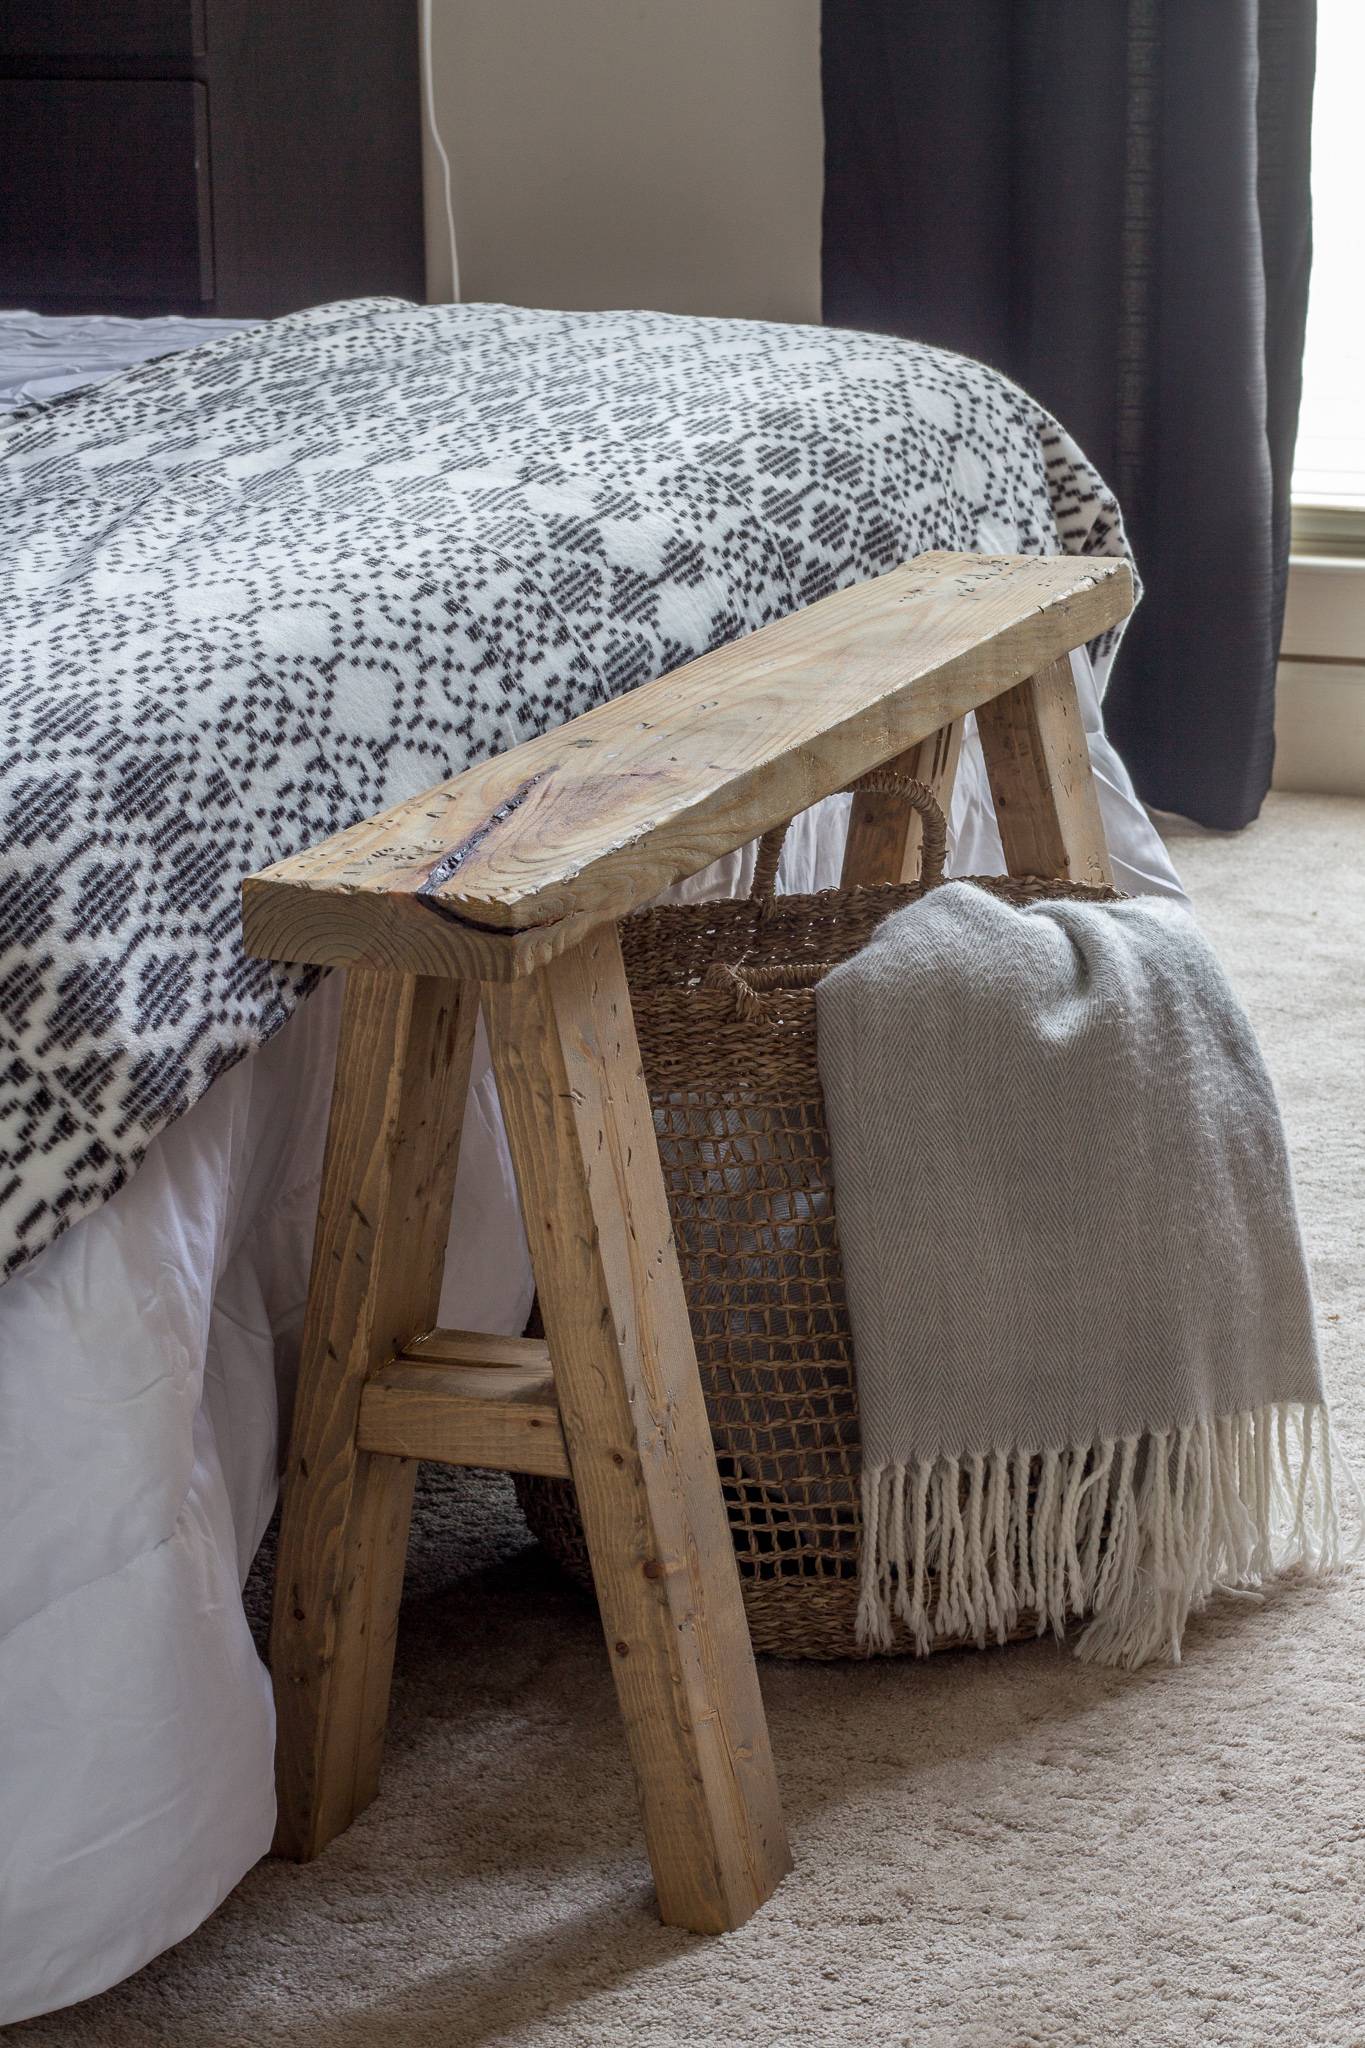
Outdoor Furniture and Decor
Moving outside, the durability of 2×4 wood makes it ideal for outdoor furniture and decor. Projects like benches, planters, and even outdoor games can withstand the elements if constructed and treated properly.
Building an outdoor bench is a fantastic project that not only enhances your garden or patio but also gives you the opportunity to work on larger scale constructions. The straightforward design means you can focus on perfecting your cuts and ensuring everything fits together seamlessly.
Small Projects and Gifts
If you’re looking for something a little less ambitious or perhaps a handmade gift, small projects are the way to go. Picture frames, birdhouses, and wooden toys are all great options that don’t require a lot of material or time.
Small projects allow you to experiment with different styles and techniques without the commitment of a larger build. They’re also a fantastic way to use up any scrap wood you might have lying around from previous projects.
- Picture frames: Practice your miter cuts and create a personalized gift.
- Birdhouses: Learn how to assemble small pieces and add a touch of nature to your garden.
- Wooden toys: Get creative with shapes and build something fun for the kids.
Step-by-Step Guides
Let’s dive into some step-by-step guides for two popular projects: a simple table and a sturdy workbench. These guides will provide a clear path from start to finish, ensuring you have all the information you need to complete your project with confidence.
Creating a Simple Table
Building a table is a fundamental skill in woodworking. It teaches you about proper leg placement, tabletop construction, and creating a stable base. Here’s a basic outline to get you started:
- Choose your table size and design.
- Gather your materials and cut your 2x4s to length.
- Assemble the table legs, making sure they’re square and even.
- Join the legs with aprons to create a frame.
- Attach the tabletop boards and secure them to the frame.
- Sand and finish your table to your liking.
Remember, precision is key, so take your time with each step to ensure your table is both beautiful and functional.
Building a Sturdy Workbench
A workbench is not just a project; it’s an investment in your future woodworking endeavors. A solid workbench provides a stable surface for all your projects and can be customized with additions like vices or tool storage. For more 2×4 project ideas, here’s how to build a basic workbench:
- Determine the size of your workbench based on your space and needs.
- Cut your 2x4s to length for the legs, supports, and tabletop.
- Assemble the leg frames and connect them with the supports.
- Create the tabletop by joining 2x4s and attach it to the leg frames.
- Add any additional features like shelves or drawers.
- Sand and treat the wood to withstand heavy use.
A workbench is a true testament to your skills and serves as a cornerstone for many future projects.
“Easy 2×4 Building Project Ideas: What …” from tmoorehome.com
Finishing Touches
Once your project is built, the finishing touches will make all the difference. Sanding, staining, and sealing your work not only enhances its appearance but also protects it for years to come.
Sanding and Staining Your Project
Sanding is about more than just smoothing; it’s about preparing the wood to receive the stain evenly. Start with a coarse grit and work your way up to a fine grit for a glass-smooth finish. When staining, apply evenly and wipe off excess for a professional look.
Remember, the finish you choose will greatly impact the final look of your project. Whether you go for a natural oil, a vibrant stain, or a clear varnish, make sure it complements the style and purpose of your piece.
Sealing and Protecting Wood for Longevity
Outdoor projects, in particular, need to be protected from the elements. A good sealant will keep water and UV rays from damaging the wood. Apply a sealant suited for exterior use and follow the manufacturer’s instructions for the best results. Reapply as necessary to keep your project looking great year after year.
Tips and Tricks For 2×4 Woodworking
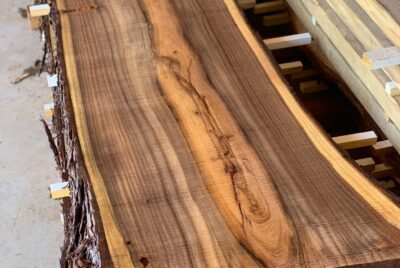
Working with Imperfect Wood
Not all 2x4s are created equal. You might find some with knots, warps, or other imperfections. The trick is to use these to your advantage. Knots can add character to a piece, and slight warps can often be worked out during assembly. Choose your wood carefully, but don’t shy away from a piece with a little personality.
Maximizing Efficiency and Reducing Waste
2×4 woodworking is as much about planning as it is about building. To reduce waste, plan your cuts to get the most out of each board. Save your scraps for small projects or practice pieces. And remember, efficiency also means working safely to avoid mistakes that could spoil your materials or, worse, cause injury.
For more ideas and quick and easy woodworking projects, tap here.
“2×4 Projects – 11 Incredible Things You …” from www.popularmechanics.com and used with no modifications.
Frequently Asked Questions on 2×4 woodworking
1. Is 2×4 wood strong enough for furniture?
Yes, 2×4 wood is definitely strong enough for furniture. It’s a common choice for framing houses, so it’s more than capable of supporting the weight of everyday furniture. Just ensure that your design includes enough support for the intended use.
2. Can I make 2×4 projects without power tools?
Absolutely! While power tools can make the job quicker and easier, you can certainly complete 2×4 woodworking projects with hand tools. You’ll need a little more elbow grease and patience, but it’s a great way to learn the fundamentals of woodworking.
3. What are the most cost-effective 2×4 projects?
Projects that require minimal hardware and use 2x4s efficiently will be the most cost-effective. Think simple designs like benches, shelves, and tables. These often use whole or half lengths of 2x4s, minimizing cuts and waste.
4. How do I protect my outdoor 2×4 projects from the elements?
For outdoor projects, it’s crucial to use a wood sealant designed for exterior use. Look for products that offer UV protection and waterproofing to shield your project from sun and rain. Apply as directed and maintain the finish as needed to prolong the life of your outdoor pieces.
5. What safety equipment is needed for 2×4 woodworking?
When working with any wood, you should always wear safety glasses to protect your eyes from sawdust and debris. Hearing protection is also important when using loud power tools. Additionally, wear gloves to avoid splinters and a dust mask to prevent inhalation of sawdust. Safety should always be your top priority.
6. Where can I find more woodworking ideas and plans?
Here’s a great place to learn more about woodworking projects.