Woodworking Router Templates Guide & Patterns for Precision Cutting
- Router templates enhance precision and repeatability in woodworking projects.
- Choosing the right router and template material is crucial for success.
- Popular router template patterns include circles, dovetails, and lettering.
- Custom templates can be designed to bring unique ideas to life.
- Proper securing and guiding techniques are key for accurate cuts.
Carving Your Path to Precision
When it comes to woodworking, the joy is in the details. And nothing brings out those details quite like a router template. It’s like having a map that guides your router bit to carve out shapes, designs, and joints with pinpoint accuracy. But before we dive into the nitty-gritty of templates, let’s understand why they’re a game-changer for woodworkers.
The Role of Router Templates in Woodworking
Think of router templates as your personal woodworking assistants. They make sure that every curve and corner is exactly where it needs to be, every single time. Whether you’re crafting a custom piece of furniture or adding a decorative edge to your project, templates are the secret to consistency and precision.
Choosing the Right Router and Template Material
Before you start routing, you need the right tools. The router itself should feel comfortable in your hands and have enough power to tackle the job. But just as important is the template material. Acrylic is a popular choice because it’s durable and gives you a clear view of what you’re doing. MDF is another option that’s easy on the wallet and easy to work with.
Now, let’s talk about patterns. These are the shapes that your router will follow, and there are plenty to choose from.
Patterns for Perfection: Exploring Template Designs
Popular Router Template Patterns
Some patterns are like the greatest hits of woodworking. Circles are a classic, perfect for creating round tabletops or wheels. Dovetails, with their interlocking strength, are a go-to for drawers and boxes. And for a personal touch, lettering templates let you add names, addresses, or even a bit of wisdom to your work.
Designing Custom Templates for Your Projects
But what if you want to break the mold? Designing your own custom templates is not only possible, it’s a pathway to truly unique creations. Start with a drawing, transfer it to your template material, and carefully cut it out. Remember, the more precise your template, the more precise your cut will be.
With your template ready, it’s time to get cutting. But before that router touches wood, there’s a crucial step that ensures everything goes smoothly.
Your Step-by-Step Cutting Guide
Securing Your Template and Workpiece
First things first, your template needs to stay put. Double-sided tape is a simple yet effective way to keep it in place. But make sure the tape doesn’t interfere with the router’s path. Now, clamp down your workpiece securely. Any movement here could mean a mistake that’s tough to fix.
Next up, guiding the router. This is where your skill really shines.
Guiding the Router with Confidence
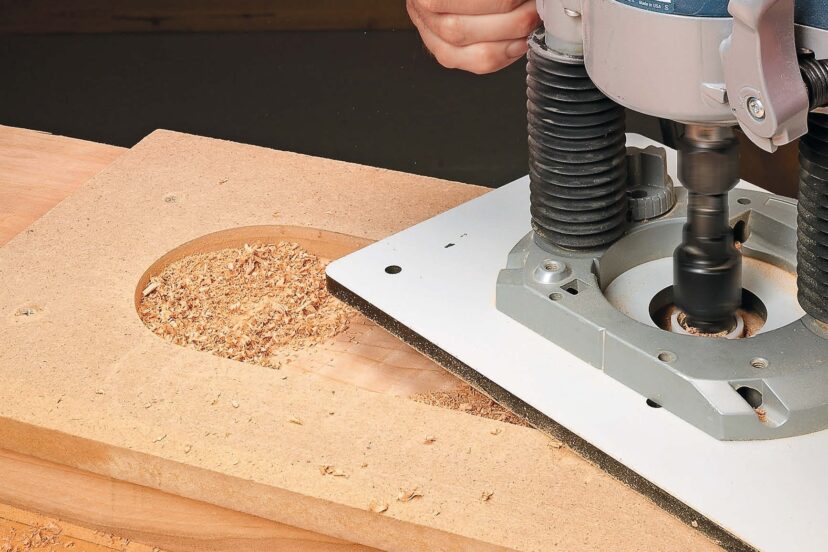
Once your template and workpiece are secure, it’s time to guide your router with confidence. Begin by choosing the right bit for your project. For most template work, a straight or spiral bit will do just fine. Make sure the bit is sharp and clean for the smoothest cut. Now, set the router’s depth. Start shallow; you can always make another pass if you need to go deeper. When you’re ready, turn on the router and let it come up to speed. Then, gently guide it along the template, keeping a steady pace. The key here is to let the router do the work. Pushing too hard can burn the wood and wear out your bit.
Finishing Touches for a Polished Result
After routing, your project might look a bit rough around the edges. But that’s nothing a little sanding can’t fix. Start with a medium grit to smooth out any rough spots, and then switch to a finer grit for a polished finish. If you’ve routed a decorative edge, a touch of stain or oil can really make it pop. And there you have it—a professional-quality cut, made by you.
Expert Tips for Impeccable Routing
Maintaining Router and Bit Integrity
For impeccable routing, maintaining your tools is non-negotiable. After each use, clean your bits and check for signs of wear. A dull bit is not only inefficient, but it can also be dangerous. And don’t forget about your router. Keep it clean and check for any loose parts. A well-maintained router is a safe router, and it’ll give you better results too. Learn more about maintaining woodworking machinery for optimal performance.
Most importantly, always wear safety gear. Goggles and ear protection are a must, and a dust mask will keep those wood particles out of your lungs. Safety isn’t just a suggestion; it’s a requirement for smart woodworking.
Advanced Techniques for Complex Cuts
Once you’ve mastered the basics, it’s time to tackle more complex cuts. Want to create an inlay? Use a smaller diameter bit and a steady hand. Working on a multi-layered project? Router templates can be stacked to achieve the desired depth. And for really intricate work, consider a plunge router. It allows you to start and stop your cut anywhere on the wood, perfect for those complicated patterns.
Besides that, don’t be afraid to experiment in your woodworking shop. The more you practice, the more techniques you’ll discover. And with each project, your skills will grow.
Patterns to Last a Lifetime: Creating Timeless Pieces
Remember, the beauty of woodworking is not just in the finished piece, but in the process of creating it.
Woodworking is more than a hobby—it’s a way to create pieces that will be cherished for generations. Whether you’re making a simple picture frame or an heirloom-quality dresser, the patterns you create with router templates can become a part of your legacy.
Therefore, take your time with each project. Enjoy the process of selecting your wood, designing your patterns, and watching as your router transforms a simple piece of lumber into something extraordinary. Because in the end, it’s those handcrafted details that make all the difference.
And there you have it, a comprehensive guide to mastering the art of router templates. With the right tools, a bit of practice, and a dash of creativity, you’re well on your way to precision cutting and timeless woodworking projects. So go ahead, fire up that router, and let the shavings fall where they may. Your next masterpiece awaits.
For more on woodworking tools and quick and easy woodworking project ideas, tap here.

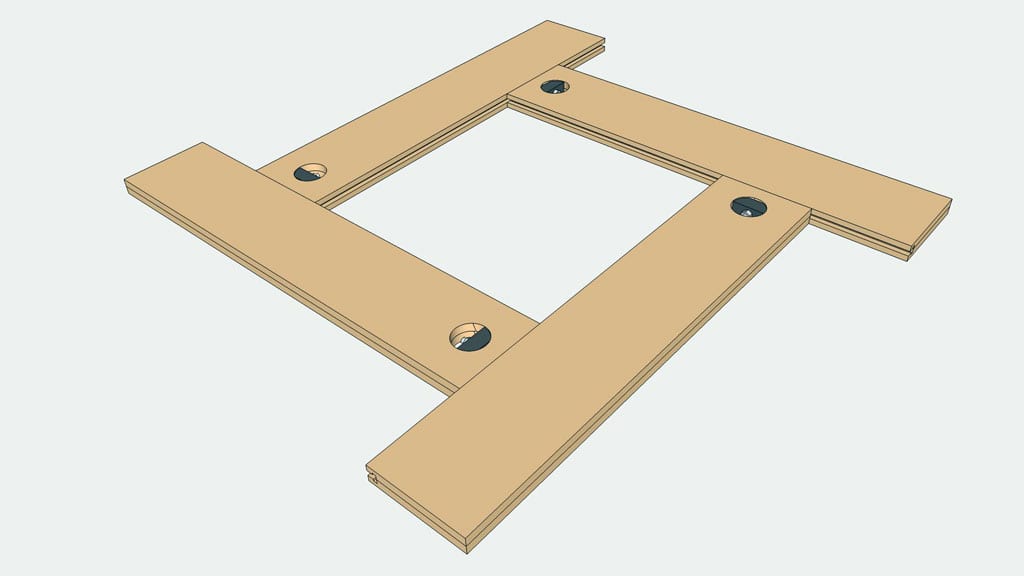
“DIY Adjustable Router Template Guide …” from www.paoson.com and used with no modifications.
Frequently Asked Questions (FAQ) On Woodworking Router Templates
1. What Materials Work Best for Creating Router Templates?
When it comes to making router templates, the choice of material is crucial for the success of your project. The most commonly used materials are:
- Acrylic: It’s clear, which allows you to see the wood beneath it, and it’s sturdy enough to withstand the force of the router bit.
- MDF (Medium Density Fiberboard): This is a cost-effective option that’s easy to cut and shape, making it ideal for one-off or limited-use templates.
- Phenolic Resin: Known for its durability and stability, phenolic resin templates can withstand repeated use without wearing down.
- Plywood: A good choice for templates that require more structural strength, especially for larger patterns or jigs.
Ultimately, the best material for your router template will depend on the specifics of your project, including the complexity of the design and the frequency of use.
2. How Do I Prevent My Router Bit from Slipping During a Cut?
Slippage can be a real problem, leading to inaccuracies and potential accidents. To prevent your router bit from slipping during a cut, make sure to:
- Check that the collet and router bit shank are clean and free from debris.
- Insert the bit into the collet as far as it will go, then pull it back out slightly before tightening.
- Use a collet that matches the shank size of your router bit for a secure fit.
- Ensure that the collet nut is tightened properly, but don’t over-tighten as this can cause damage.
By following these steps, you can ensure that your router bit stays firmly in place, providing you with control and precision during your cuts.
3. Can Woodworking Router Templates Be Reused Multiple Times?
Absolutely, router templates can be reused multiple times, especially if they’re made from durable materials like acrylic or phenolic resin. To maximize the lifespan of your templates:
- Store them flat and away from extreme temperatures to prevent warping.
- Keep the edges smooth and free from nicks, which can affect the precision of your cuts.
- Clean them after use to remove any sawdust or resin build-up.
With proper care, a well-made router template can last for many years and countless projects.
4. What’s the Best Way to Secure a Template to the Workpiece?
Securing your template to the workpiece is critical for accuracy. The best way to do this is by using:
- Double-sided tape: It’s strong enough to hold the template in place but can be removed without leaving residue.
- Clamps: For larger templates, clamps can provide a firm hold without the risk of the template shifting.
- Non-slip mats: These can be placed under smaller workpieces to prevent movement during routing.
Choose the method that best suits the size and shape of your workpiece and template, and always check for stability before you begin routing.
5. How Can I Create Custom Patterns for Unique Projects?
Creating custom patterns is a fantastic way to add a personal touch to your projects. Here’s how you can do it: For inspiration and guidance on creating your own patterns, check out Templates for Router Success.
- Start with a clear idea of the design you want to create. Sketch it out on paper or use design software if you’re comfortable with technology.
- Transfer your design onto your chosen template material using a pencil or marker. If you’re using a computer, you can print out your design and adhere it to the template material.
- Carefully cut out your design using the appropriate tools, such as a jigsaw or a bandsaw for larger templates, or a hobby knife for smaller, more intricate designs.
- Refine the edges of your template with sandpaper or a file to ensure smooth routing.
With a bit of practice, you’ll be able to turn your own designs into custom templates, opening up a whole new world of woodworking possibilities.
6. Where can I learn more about woodworking tools and project plans?
· Here’s a great place to learn more about woodworking tools and plans.
Woodworking router templates are essential tools for any woodworker looking to achieve precise cuts and intricate designs. These templates guide your router along the desired path, ensuring consistent results across your woodworking projects. For those looking to improve their technique or expand their template collection, exploring a variety of router templates can be incredibly beneficial.


